One of the tool we can use to secure our Ubuntu box from incoming attacks, if we can’t establish a whitelist for incoming connection is fail2ban. Point fail2ban to your “/var/log/auth.log” on debian-based, or “/var/log/secure” on Redhat-based distros to automatically add offending IPs to your firewall and stopping them from DDoS-ing the server.
On Ubuntu, fail2ban is included in the standard repo. Installing Fail2ban to your box is as easy as:
sudo apt update && sudo apt install fail2ban
Fail2ban default installation enable filter for incoming ssh connection and create a firewall entry using iptables. But what if you want ssh to use custom port, and since you’re on Ubuntu, you want to use ufw instead of iptables?
First, let’s change the port used by sshd to listen to incoming connection
sudo nano /etc/ssh/sshd_config
Find this line
#Port 22
Uncomment and change it to
Port 2251
Replace “2251” with the port you want to use. Save and close the config file, and restart sshd
systemctl restart ssh
Next, create ufw app profile for the new port configuration. We can start by using the existing ssh profile as a template
sudo nano /etc/ufw/applications.d/openssh-server
..and modify it accordingly, from
[OpenSSH]
title=Secure shell server, an rshd replacement
description=OpenSSH is a free implementation of the Secure Shell protocol.
ports=22/tcp
To look like this
[OpenSSH]
title=Secure shell server, an rshd replacement
description=OpenSSH is a free implementation of the Secure Shell protocol.
ports=22/tcp

[OpenSSH-2251]
title=Secure shell server, an rshd replacement
description=OpenSSH is a free implementation of the Secure Shell protocol.
ports=2251/tcp
Ufw should now report our custom sshd port profile on its’ app list
surfer@tobegundam:~$ sudo ufw app list
Available applications:
OpenSSH
OpenSSH-2251
Postfix
Postfix SMTPS
Postfix Submission
To customize the sshd jail, open the jail configuration file
sudo nano /etc/fail2ban/jail.confAnd configure it to look like this
[sshd]
port = 2251
action = ufw[application="OpenSSH-2251", blocktype=reject]
logpath = %(sshd_log)s
backend = %(sshd_backend)s
Note that “action” pass the “application” parameter that corresponds to the app profile that we have created earlier. Reload fail2ban so that it recognizes the new jail configuration
sudo fail2ban-client reload
Now you can test the jail. Try logging in to the box with invalid credentials a couple of times, and check the jail status
surfer@acsivmscmapp:~$ sudo fail2ban-client status sshd
Status for the jail: sshd
|- Filter
| |- Currently failed: 0
| |- Total failed: 10
| `- File list: /var/log/auth.log
`- Actions
|- Currently banned: 1
|- Total banned: 2
`- Banned IP list: 124.214.xxx.yyy
And check whether the ufw filter has been added
To                         Action      From
--                         ------      ----
2251/tcp (OpenSSH-2251)    REJECT IN   124.214.xxx.yyy
2251                       ALLOW IN    Anywhere
8443                       ALLOW IN    Anywhere
2251 (v6)                  ALLOW IN    Anywhere (v6)
8443 (v6)                  ALLOW IN    Anywhere (v6)
If you have multiple ports up for sshd, you can configure the app profile like this
[OpenSSH]
title=Secure shell server, an rshd replacement
description=OpenSSH is a free implementation of the Secure Shell protocol.
ports=22/tcp

[OpenSSH-custom]
title=Secure shell server, an rshd replacement
description=OpenSSH is a free implementation of the Secure Shell protocol.
ports=2233,2251/tcp
And update the jail rule accordingly
[sshd]
port    = 2233,2251
action = ufw[application="OpenSSH-custom", blocktype=reject]
logpath = %(sshd_log)s
backend = %(sshd_backend)s
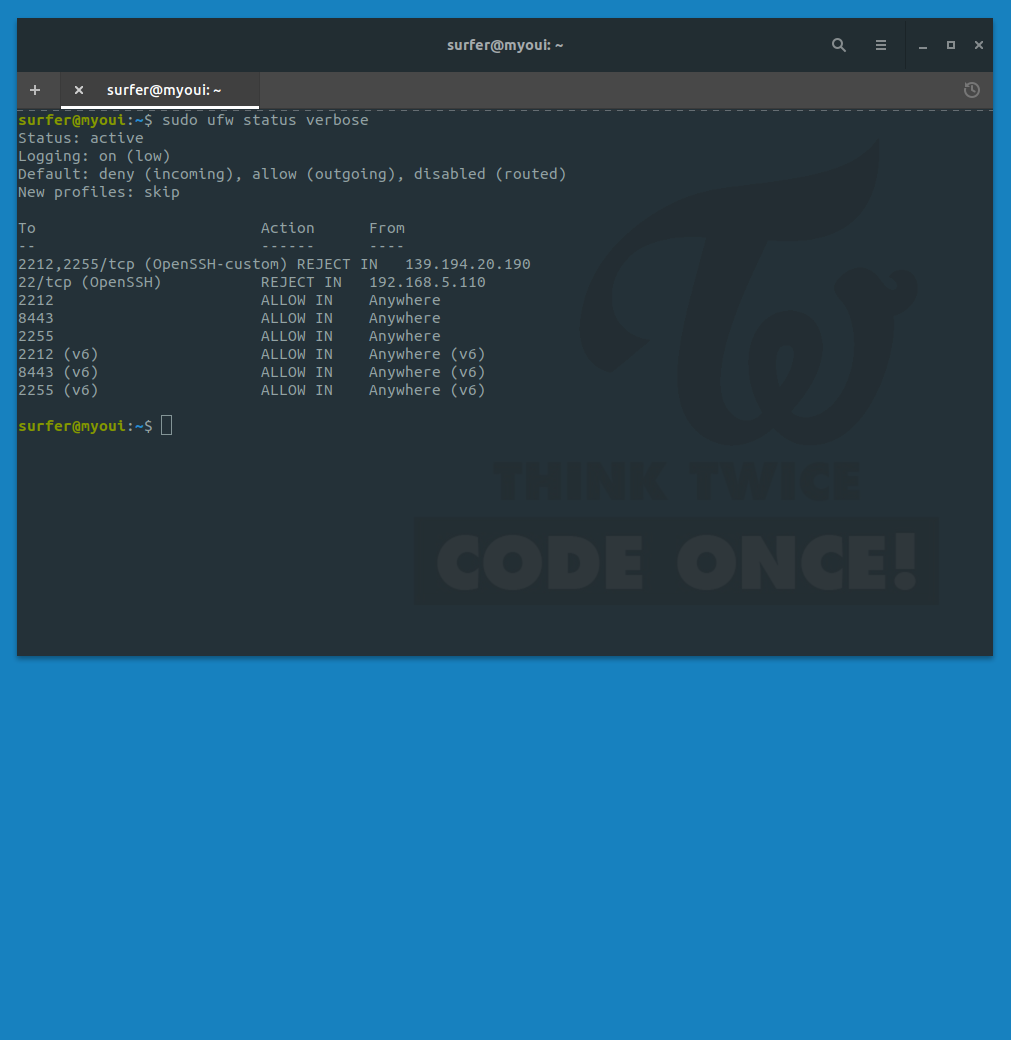
..and the resulting ufw should look like this
To                         Action      From
--                         ------      ----
2212,2255/tcp (OpenSSH-custom) REJECT IN   124.214.xxx.yyy
22/tcp (OpenSSH)           REJECT IN   192.168.5.110
2212                       ALLOW IN    Anywhere
8443                       ALLOW IN    Anywhere
2255                       ALLOW IN    Anywhere
2212 (v6)                  ALLOW IN    Anywhere (v6)
8443 (v6)                  ALLOW IN    Anywhere (v6)
2255 (v6)                  ALLOW IN    Anywhere (v6)
The setup will result in failban inserting an ufw filter that block both ports configured on that particular profile. Optionally, you can also set separate app profiles and jail setups for each ports, if it’s required
