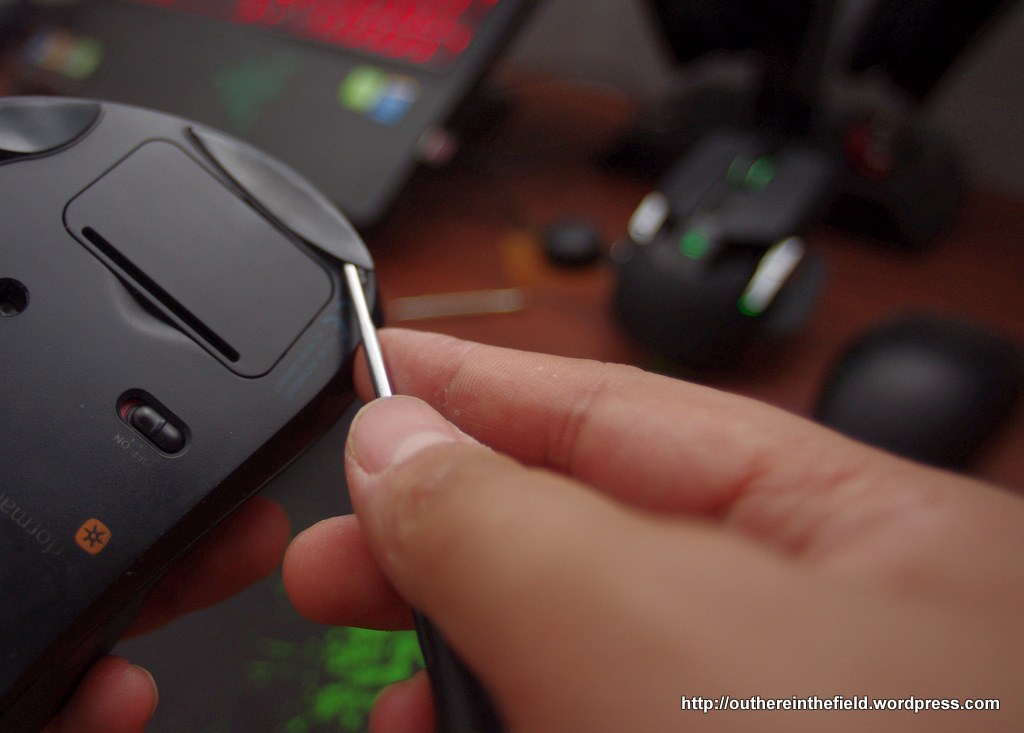
So, recently, the scroll wheel of my 4 years old M950 Performance MX got stuck. While the usual clicky wheel mode is not affected , the free scrolling mode is totally unusable. So I decided it’s time to clean it up. Here’s what you need:
- A medium sized regular slot screwdriver
- A small and medium sized Philips screwdriver
- A blower
- Optionally, a double sided scotch tape, and a scissor


ATTENTION: First thing first. Turn off the mouse, and take the battery out of the compartment. You wouldn’t want to damage your expensive mouse would you? Please consider that doing this will surely void your warranty. Also I will not be responsible to anything that might happen to your mouse. Do it at your own risk.
Now. let’s get started. The M950 is secured by 4 screws, placed under the mouse foo.. err feets. Use the slot screwdriver to peel off the feets carefully as not to tear them or damage the their adhesive surface, and expose the screws.


Unscrew the 4… uh screws, keep it somewhere safe. Now, keep in mind that there’s a power cable for the power indicator led that runs from the board at the lower part of the mouse to the top cover, so take top half off slowly and carefully. The left side of the mouse might require some delicate wiggling, but believe me, it’s doable.


Disconnect the power cable connector with your finger. You might be tempted to use a slot screwdriver to do it, but please don’t. If you’re not careful enough, the screwdriver might slip and hit a component on the electronic board, damaging it beyond repair. Also do not pull it by the cable, you might damage the connector.


There’s a pin that secure the scroll wheel compartment. Take it off, place it somewhere safe.


Now you can pull the scroll wheel component out of the board. As you can see, the bottom half of the wheel is covered by a plastic compartment. In my case, after 4 years of heavy usage, the compartment is filled with dust and dirt. To clean it up, first, I use the blower to clean up the dust. Then, since the wheel component is a pure mechanical stuff, I put it under a slow running water, and let it dry for a while. Test it out, see if it’s still clogged.


If you’re satisfied with the result, make sure that the wheel component is completely dry, then put it back on the board. Put the pin back to secure the wheel it its’ place. Clean up the rest of the mouse with the blower. Avoid using compressed air can, as the pressure may damage the board.


Put the top cover back, start from the right side of the mouse. You might need to push a bit for the left side to snap back properly


Put the screws back, and then the mouse feets. If you happen to damage the adhesive surface of the feet, replace it with the double sided scotch tape. Take a piece of the tape, peel one of side, and stick the feet on that side. Use the scissor to take out the excess. Make sure that you don’t damage the feet itself. Peel the other side of the tape, then put the feet back in its’ place.
Insert the battery back, pray to your chosen $deity, turn it on and test the mouse. Hopefully, your mouse will work normally 😀


great
Thanks! Feels like a new mouse now. Just a tip though. I used a piece of paper cut it the same width as the mouse’s wheel and then pushed it through the mouse wheel and the plastic bottom compartment and the dirt just popped right out. Hope this helps.
Just did this on my Performance MX. It seems to have fixed the ‘jumpy scroll’ problem, where the page randomly scrolls too far while using the wheel.
One warning, though. I used dish soap and running water to clean the wheel assembly and now I see traces of rust on the wheel. Not sure if that’s because of the dish soap or water. If I had to do this over again, I would have briefly rinsed the assembly with water or maybe just alcohol..
For good measure, I cleaned the scrolling sensors and wheel fins with alcohol after the ‘bath’.
My scroll wheel was already covered with rust when I did this, so I can’t really say. I think you can still use water but just make sure that you dry it properly, may be like using hair drier
NEVERMIND. I still had the ‘jumpy scroll’ problem, afterwards. Turns out the Logitech Set Point software was causing it. I disabled the app until I can find a version of it that doesn’t have this bug. C’mon, logitech!
BTW, I dried my wheel assembly pretty quickly after it’s ‘bath’. I would avoid water, altogether. But that’s just me.
What would really have been useful are those floss picks with the bristle tip. They look like little pipe cleaners. That would have cleaned the wheel well without having to use too much water.